After spending last week preparing and starting renders I have put together one final test to check the transition from Rag stone to Bath stone. This is one test that could only be seen and checked properly through caring out complete renders of the last camera shots, so a lot of faith went into it working. Rendering itself has taken up a lot of time over the last few days, I have found that the occlusion layers are taking a far longer than any other layer to render and I will need to allow more time to compensate.
Test for final shots (low detail and strange ratio, due to movie maker compression to make file small enough for blog):
Tuesday, 29 December 2009
Wednesday, 23 December 2009


Monday, 21 December 2009
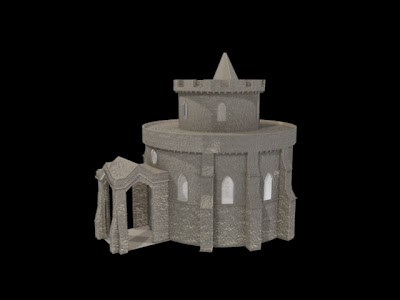
Fadeing Windows
Transition is in place for the build of the chancle. After trial and error the windows fade in while still being transparent as windows should. There is a slit problem with the aspect ration in this render which has occured after running the video file through movie maker to compress the file small enough for the blog.
Experimenting Works
I have put my alpha channels on a ramp shader, and animated the ramp to show fade the window into shot when required.
Another way to do this would be in post production with multiple renders of the scene with each layer of elements fadeing in in turn. ( this will be a lot of layers)
Tests will need to be carried out to see if its the best method.
Another way to do this would be in post production with multiple renders of the scene with each layer of elements fadeing in in turn. ( this will be a lot of layers)
Tests will need to be carried out to see if its the best method.
SERVER WEATHER
Due to the amount of snow and ice on the roads and delays on trains I will not be able to make it into uni today for the extra time kindly provided by Phil and Alan, hopefully it will clear up and i will make it in tomorrrow.
Luckly, up to now, the only question I had for Alan is about animating alpha channels for the windows. What I want is for the windows to fade into shot, in turn with the other elements of the chancle.


Saturday, 19 December 2009
Stained Glass Windows
Its been a long snowy day!!!
Today I started working like any other with snow on the ground and kids out playing. I worked through the making staine my staine glass windows when a power cut hit Dover stoping me in my tracks, giving a short break, enough time to enjoy the festive weather.
With all the set backs, the snow has brought, and the power up and running once again, I am back on track. Staine Glass Windows are made and in place. Alphas are still need for the right transplarency, and the colours need working on to fit in with the surroundings. 

Today I started working like any other with snow on the ground and kids out playing. I worked through the making staine my staine glass windows when a power cut hit Dover stoping me in my tracks, giving a short break, enough time to enjoy the festive weather.
With all the set backs, the snow has brought, and the power up and running once again, I am back on track. Staine Glass Windows are made and in place. Alphas are still need for the right transplarency, and the colours need working on to fit in with the surroundings.


Thursday, 17 December 2009
Stained Glass Windows
From Stencil to Texture


As my camera Angles have now changed so have some of the details which are needed. A number of close shots of windows has made its way into the shot sequence, so stain glass window details for some of the windows have been added to give the audience a focus point within some of these longer sequences. The alpha is still to be added to allow the camera to see through the window and tweaking is still to be carried out on the bump texture walls.


As my camera Angles have now changed so have some of the details which are needed. A number of close shots of windows has made its way into the shot sequence, so stain glass window details for some of the windows have been added to give the audience a focus point within some of these longer sequences. The alpha is still to be added to allow the camera to see through the window and tweaking is still to be carried out on the bump texture walls.
Wednesday, 16 December 2009
Tuesday, 15 December 2009
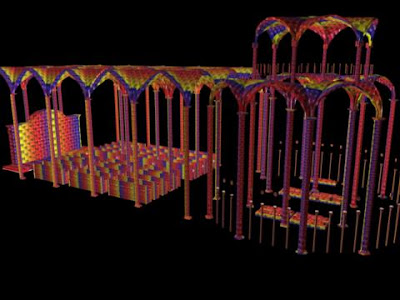
Cameras
With all animation the camera goes through a process of slowing in and out of each move movement which softend the transition for audiences to watch. Maya has a facility in which to calculate and proform this process easily by flatterening the taganets (maya controls for keyframes). This flatterning of tagents for my animation appears to not only slow the camera move in and out of each key frame, it also appears to pause the camera movement for a moment, resulting in a very unsmooth motion of the camera.
Flatterened Tangents:
From this result I decided to try the plateau tangent setting, which similar to the flatterned tagents softens the motion of the transitions between keyframes but also maintains the continous motion.
Plateau Tagents:
The Camera is still to be refinded.
Monday, 14 December 2009
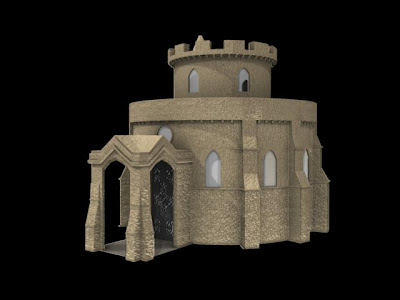
Decoration
Decorative Umbras. Likely to have been decorated with the crucifix and candles for worship.

Opening Camera
My previous establishing shots have been pretty bland. My lastest camera attempt adds a sense of scale, however the camera movements need fine tuning and moves a little fast in places.
Sunday, 13 December 2009
screen tests

Saturday, 12 December 2009
Screen tests
All lights on - brick work still a little to deep in bump map
 - brick work still a little to deep in bump map
Chancel lights on


Friday, 11 December 2009

Texturing
Inside Chancel Roof 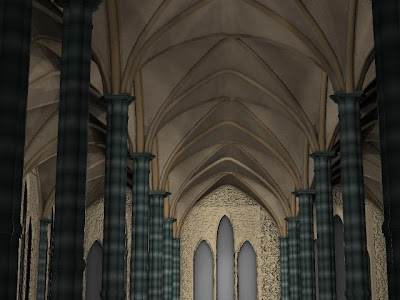
Aumbras
 Reredos
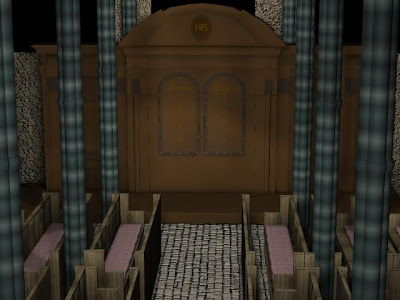
Inside Nave


Inside Nave Roof


Aumbras
 Reredos
Inside Nave

Over all the lighting and textures are falling into place, some areas still need work. As you can see I have moved away from the complete pastel colour scheme to allow realism and depth, I still need to resolve a few colours to bring them back into the colour range throughout the piece. I now need to decide how i intend to indicate the areas being described in the narration. I am currently leaning towards my original idea of having the items emit a low glow for indication, rather than have a white environment where the colours and textures indicate the items. the colours and textures have brought this environment to life, it seems wrong to send it back again. Ill do tests for all ideas mentioned in this post and previous to help influence my decision.
Wednesday, 9 December 2009

Tuesday, 8 December 2009
More Light Test
I have moved on to lighting the inside of the church. In the image below i have lite the inside using point lights at a low intensity level positioned just below the windows to look like the light is coming from outside. The only difference between the first and second image is the floor, which by changing, has given a better effect.


Sunday, 6 December 2009
Inside colour and lighting test

First test run through the lighting and colour textures for the inside of the church. I have tried to create the inside of the in an ambiance occlusion style as the out, however through trial and error there is no occlusion showing up for the interior of the building. The bump maps need reducing as the inside walls need to be smoother than the out, this just isn't working at the moment. The light themselves are also to dark. To recreate the interior of the Maya church to play true to that of the church that stands in London, the space needs to have more light without having interior lights. The Temple church in London was bright with all its light coming from outside. However with all the problems this test piece has, it is on the right lines. for this piece, i need to render out in render layers for the interior and the exterior because as you can see from the image below the light and shadows are not right.

Friday, 4 December 2009
Camera Test
As suggested by Alan I have spent this morning testing camera focus lengths to try to add curvature to the focus so that the building does not look so flat.
The original is at a focus of 35:
I also tried an focus length of 50: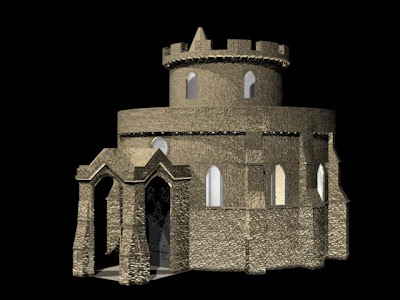
Focus length of 70:
and a focus length of 80: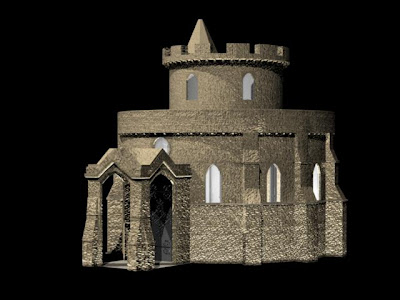
The angle that looked best that I added the trimmings to in Photoshop is a focus length of 75: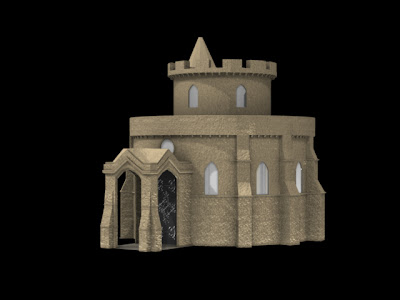
This camera focus has also helped the colour of the building. The process and filters for this focus length is exactly the same as that for the focus length of 35. This last image is almost the colour I'm after, there's something still not there yet though.
The original is at a focus of 35:

I also tried an focus length of 50:

Focus length of 70:

and a focus length of 80:

The angle that looked best that I added the trimmings to in Photoshop is a focus length of 75:

This camera focus has also helped the colour of the building. The process and filters for this focus length is exactly the same as that for the focus length of 35. This last image is almost the colour I'm after, there's something still not there yet though.
test animation
A quick animation to test colour, light, and shadows along with render time. It took nearly 5 hours to render to 770 frames in 7 render passes.
Wednesday, 2 December 2009
more lighting and colour tests
The colours are fading towards realism in this test, maybe a little to dark and grey though.
I do have problems keeping my bump map files attached to the shader. I havent moved the files around or changed settings since playing to get an effect to try. Yet when I go back to it a day or so later the files say they are attched but there is no effect in my renders and than again other times it will be joined and work ok. Any ideas on how to fix this problem?

I do have problems keeping my bump map files attached to the shader. I havent moved the files around or changed settings since playing to get an effect to try. Yet when I go back to it a day or so later the files say they are attched but there is no effect in my renders and than again other times it will be joined and work ok. Any ideas on how to fix this problem?
Tuesday, 1 December 2009
More UV layouts
I have layed out the UVs for all items within my model along side getting the colour swatches and bump maps. The layouts took long than planned, I should have finished them yesterday but thanks to a power failure I fell a little behind but set backs are always things to be anticipated when giving yourself working goals during a project. Thankfully not to much work was lost. On to more colour swatches, textures and interim Crit prep.

Subscribe to:
Posts (Atom)
